According to experts, simple assessments can reveal much about a soil’s capabilities and resilience. CPM takes out a spade and digs deep to find out more.
“You might not want to use your best tea service but don’t shy away from some bucket chemistry in the kitchen.” MEGAN DUNN
By Mike Saull
Growers – when was the last time a spade was out in earnest on-farm? Experience suggests it’s only a handful of enthusiasts who do so, yet the physical experience of slicing into the top 30cm or so can indicate a lot about topsoil.
For one, this builds up a feel for the growing environment ahead of tilling and establishing a crop. And while most have a good idea of what lies beneath, without looking, can it be said with certainty that more isn’t required to get the structure right?
Megan Dunn, soils and natural resources assistant at Innovation for Agriculture (IfA), works with farmers to do just that. Alongside introducing simple visual or physical assessment techniques in the field, IfA has developed guidelines to further test soils in the farm kitchen.
“There’s no doubt there’s a growing interest in assessing soils – we’re increasingly working with farmers demonstrating simple assessment techniques at open days and events,” she says.
“We equip farmers with introductory tools, encouraging everyone to take their spade out of the shed and keep it with them in the back of the farm truck. However, it almost takes a problem to occur before some will dig deep to examine further, and by then it’ll be much harder to remediate the damage.”
According to Megan, the most common issues are down to water management, with either flooding and waterlogging after peak rainfall periods, or the ability of soils to support crops during periods of drought in the summer.
She suggests the best time to examine soils is when they’re moist and roots are active, such as in spring. But, it’s possible to have an indication right through to autumn before working ground or establishing the next crop.
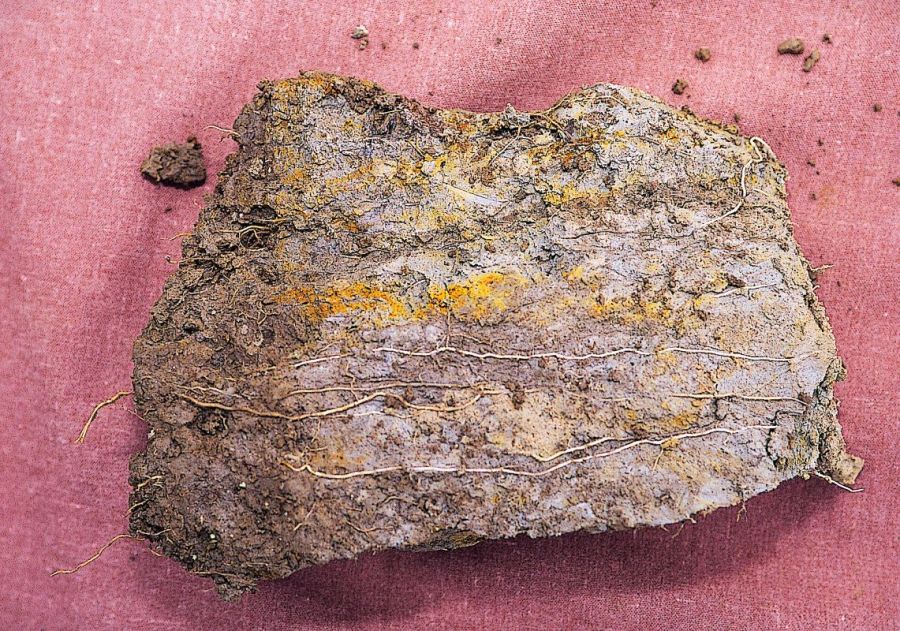
Growers should start by digging a spade-full out of the topsoil. “Push the spade in around three sides and then gently lift out the soil with the fourth, untouched side, visible for examination. Often the shear physical resistance you feel when pushing the spade in will help indicate how tight or compact it is and at what depth it’s strength and structure changes.
“Look at it, feel it, ask yourself is it fresh or sour smelling – the latter being an indicator of poor structure and bad drainage – something that’ll require correcting. Examine the aggregates carefully and the way the roots are passing through the soil. Ask is there anything restricting rooting depth – dig further and aim to see how far the roots go down.”
Megan advises referring back to the cultivations carried out in recent years to see if there’s evidence of better structuring or damage from these operations. “Maybe the soil has slumped down over time from the impact of rainfall and isn’t as loose as you’d have liked.
“Assess how easy it is to break various clods or structures in the topsoil, the best structures are porous, have roots in them and which you easily break down into crumbs. Slabby chunks of soil that are mostly large – greater than 10cm – more angular in shape and difficult to break apart with one hand, are much more compact and deserve attention.”
While soil colour can depend on the original bedrock, in general, the darker the soil, the higher the organic matter content, comments Megan. “Mottling with red/brown and grey colours indicates a zone where water lies for some of the year whereas a completely grey or gleyed colour is where water sits for most of the year.
“Go as deep as you can – perhaps using an auger or taking out another spade-full to properly check drainage at depth.
“Earthworm activity is another indicator for soil health – look for the abundance of channels and count numbers to compare with different parts of the same field,” she says.
Soil scientists have developed a simple visual assessment score for different soils – the VESS approach – but Megan suggests it’s not always necessarily to assign a numerical score to soil. “Simply note what you see and start putting some issues right with the next crop, accepting this can be a long process,” she proposes.
Alongside visual assessment, Megan highlights a number of other tests to undertake in ‘makeshift labs’ in the kitchen or utility room. “Perhaps the simplest is a slake test to assess the aggregate stability of soils when exposed to rapid wetting – for example, a heavy rainfall event. Healthy soil with a good organic matter content should hold together better as there should be higher numbers of microorganisms in the soil releasing exudates which ‘glue’ the soil together.”
To do so, Megan says create a bowl-like top with some wire mesh 3-5cm deep positioned over a glass jar or a pint glass filled to the level of the mesh with water. Put an equal quantity of aggregates of soil into the mesh and leave it for 12 hours or so.
“Over time, the soils should begin to break down into the surrounding water and settle at the bottom of the jar. The clearer the water, the more stable the soil and the less risk of loss due to flooding and erosion. Of course, building up organic matter can help stabilise soils in the longer term.”
Farmers could also carry out infiltration tests in the field by knocking a wide-rimmed pipe into the soil and putting a known amount of water into it, then timing the rate it takes to fully infiltrate the soil. Checking in different parts of the field will again give an indication of the ability of the soil to take high amounts of rainfall.
While more complex and requiring some reagents or test kits, there are a number of chemical tests which can also be undertaken. Megan suggests these could support decisions on soil fertility and fertiliser use.
“You might not want to use your best tea service, but don’t shy away from some bucket chemistry in the kitchen, use it as an opportunity to engage the whole family in the topic.”
As for testing soil pH – a characteristic fundamental to soil health and nutrient availability – there are a number of available methods including test strips. “Too high or too low a pH will affect most macro- and micro-nutrients so aim for a range between 6.5 and 7.5 using appropriate sources of lime to correct acidity,” states Megan.
It’s also possible to ascertain an idea of cation exchange capacity (CEC) – the soil’s ability to store positively charged nutrients such as calcium, magnesium, potassium and ammonium. Megan uses methylene blue as a reagent.
“The test involves putting soil and methylene blue in a funnel and allowing it to drain out to a beaker below. If the water runs clear, the soil has a high CEC and so holds onto nutrients whereas if it runs blue it has a low CEC, which for example, could mean the soil will lose high amounts of nutrients during rainfall.”
Using eosin y 1% aqueous (red dye) on the other hand, is negatively charged and represents nitrate, therefore the more intense the red colour of the water after it’s passed through the soil, the more nitrate could potentially be lost.
“CEC and nitrate leaching potential are pretty good tests to demonstrate at events as well as on farm, but both require quantifying by proper chemical analysis,” concludes Megan.
This article was taken from the latest issue of CPM. Read the article in full here.
For more articles like this, subscribe here.
Sign up for Crop Production Magazine’s FREE e-newsletter here.