In a timely series of webinars this spring, Integrated Soils’ Joel Williams gives a masterclass on how to make the best use of foliar nitrogen sprays. CPM listens in.
“The goal is to avoid the ‘spray and pray’ approach.”
By Mike Abram
Interest in foliar nitrogen applications has increased dramatically in the past couple of seasons, not least after more traditional forms of nitrogen rocketed in price and supply looked less assured at the beginning of 2022.
It’s not just commercial considerations that have prompted the interest – foliar feeding potentially offers a more efficient and quicker route to increase nitrogen in the plant, particularly later in the season, with a lower risk of leaching and other environmental impacts.
The downside, at least according to research, is results can be inconsistent and variable. But Integrated Soils’ Joel Williams, who’s spent a lot of time perusing the research literature, says that’s down to both a lack of attention on the design of the foliar application and spray conditions.

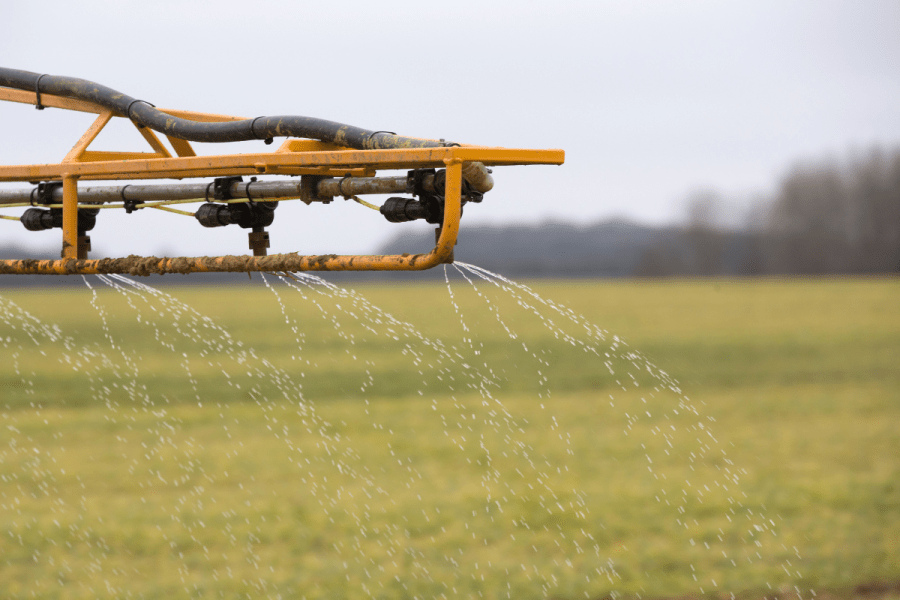
Joel Williams advises that relative humidity should be high to keep the cuticle layer dynamic, permeable and the stomata open.
“The goal is to avoid the ‘spray and pray’ approach,” he says. “It’s not just about filling up the tank, throwing in some nutrients and spraying. There are lot of things to consider.”
Most growers will be using urea as a form of nitrogen in foliar sprays. That makes sense for a number of reasons as other than amino acids, it’s the fastest form to be absorbed into the plant and its cost per unit of N is attractive.
Research has also shown that compared with nitrate and ammonium, urea is more efficient at maintaining and feeding established tillers, which is likely to be one of the main aims of foliar nitrogen applied later in the season.
The fact that urea has carbon embedded into its structure, unlike inorganic forms of nitrogen, provides an efficiency advantage, according to Joel.
“For inorganic forms, the carbon that’s required to turn the nitrogen into amino acids has to come from photosynthesis, so you’re limiting the photosynthetic potential of the plant – there’s a carbon cost.
“With organic forms, there’s still an energy cost to using them, but there’s a carbon bonus embedded in the molecule – free carbon – so the net cost to the plant is much lower.”
Using a mixture of nitrogen sources and types of application during the season is a good strategy, stresses Joel. “Plants can make use of lots of different forms of nitrogen, and they work synergistically together.”
Foliar nitrogen can overcome one of the potential weaknesses of soil-applied nutrients, their availability. “Soil-applied nutrients can be locked up in the soil so they’re not always available, and acquisition by the plant can be difficult. We can help bypass these problems with foliar sprays.”
Achieving consistent results comes down to attention to detail, says Joel, right from melting urea through to knowing what else to put in the tank, and critically, the environmental conditions when applying.
Melting urea is reasonably straightforward, with the two key points being to use water that’s as warm as possible, and agitation. Dissolving urea in water is an endothermic reaction, explains Joel, meaning the water will cool as the urea dissolves.
Using warmer water will help speed up the process, he says. “As the water temperature drops, it becomes harder to solubilise the rest of the urea, so anything you can do to raise the temperature of the water will help.”
While it’s unlikely growers will heat the water directly, storing water in a black tank in the sun allows it to warm up prior to melting.
Dissolving around one-third urea to two-thirds water should be relatively straightforward, but it’s important to keep the water moving in the tank, including at the bottom, preferably using a circulation pump while slowly feeding the urea in. Melting urea doesn’t have to be done on the day of use, it can be predissolved a few days prior, he advises.
Before adding the melted urea, think about water quality, says Joel. “It’s very clear that water quality can have a big impact on pesticide efficacy, and the same’s true of nutrient uptake. Optimised foliar nutrient sprays will use water that’s as ‘clean’ as possible.”
Rainwater is the ideal source, although a process called reverse osmosis can be used to de-mineralise water. This works by pushing the water under pressure through a semi-permeable membrane to remove salts and other contaminants that can lock up nutrients.
While kits are expensive, some Australian and Canadian farmers have found it easily pays for itself within a couple of years just on savings on herbicides, says Joel.
The pH of the final spray solution is also important, with the aim around pH 5-5.5 as optimal nutrient absorption occurs under acidic conditions. Citric acid or ammonium sulphate can be a useful addition to the brew to reduce the pH of the water before beginning to add the urea as it will slow any possible ammonia volatilisation, he says.
Typical final urea rates for cereals are around 10-20kgN/ha, 20-30kgN/ha for maize and 5kgN/ha in potatoes, where applications are more frequent. But it’s likely to not just be urea in the spray tank, says Joel.
“On top of foliar nitrogen, it’s also about all the other nutrients that work with nitrogen, particularly the trace nutrients and some of the macronutrients like sulphur, potassium and magnesium, that work with nitrogen to support its movement through the metabolic pathway, and its role in growth and protein development. So in a nitrogen strategy, we have to think about the other nutrients.”
For example, molybdenum, sulphur and iron are critical for the nitrite and nitrate reductase enzymes to break down nitrate into ammonium, while nickel is important for urease to break down urea. Manganese and magnesium are crucial for amino acid production, while a whole range of minerals play a role in converting amino acids into proteins.
If there’s a deficiency of any of these key minerals, it can potentially cause a backlog of nitrate or ammonium to build up with consequences for plant health, explains Joel. A plant sap or tissue analysis can help determine whether these or other nutrients are required.
Timing of application and its target can also help guide other nutrient additions. A spray to help increase photosynthesis, for instance, might include magnesium sulphate, iron sulphate and manganese sulphate, as these minerals are all important for optimising chlorophyll production.
A spray around grain fill, on the other hand, might contain potassium sulphate, with potassium being crucial for extending the grain filling period.
Mixing with a carbon source will help bind the nutrients, says Joel. “They’ll be less reactive, less likely to lock up with other nutrients in the tank, and in the case of urea, less likely to volatilise off the leaf surface.”
When carbon sources chelate, or bind to cations, they neutralise the positively charged cation, helping uptake into the leaf. “The plant leaf is negatively charged, so if you apply a positively charged cation it can get stuck on the leaf surface and locked up.”
Typical organic chelators include humic and fulvic acid with both acting as a carbon sponge for cationic nutrients to bind to. However, for a foliar application, Joel suggests using fulvic acid as it’s a smaller molecule that will pass into the leaf more quickly – one of the aims of foliar applications.
“Humic acid works particularly well with urea and there’s good evidence of it working in foliar applications, but generally it’s probably better for soil application.”
Part of the reason is humic acid is only soluble under alkaline conditions. With a spray pH target of 5-5.5, there’s a risk of it jellifying in the tank, while fulvic acid remains in solution at all pHs.
Other potential carbon sources include molasses – which is less effective as a chelator, but potentially helps create a slow-release mechanism for nutrients. There are also do-it-yourself sources of amino acids, such as fish or other protein hydrolysates.
“It’s possible and sometimes beneficial to use a diversity of carbon sources as they have different modes of action and roles.”
Wetters, stickers or spreaders can also be useful additives to the spray tank to help positively change the behaviour, activity or availability of the nutrients.
But before adding everything to the spray tank, it’s worth doing a jar test to check for compatibility, he warns. “Be careful with soluble calcium, for example, especially with sulphur as it’ll precipitate out to form gypsum, and the same with phosphate.”
As with any foliar spray, application is crucial for maximising effectiveness. Beyond the usual need for correct combinations of nozzles, pressure and forward speed, water volume is important to maximise coverage without inducing too much run-off.
Coating both sides of the leaf is also important, as nutrient uptake can be through the leaf stomata on the underside of the leaf, as well as through the leaf cuticle and leaf hairs.
Try to avoid spraying when the crop is stressed as that will reduce nutrient uptake, while there obviously needs to be enough leaf surface for uptake. But if there’s one factor to pay attention to when spraying, it’s relative humidity, stresses Joel.
“You want relative humidity to be high to keep the cuticle layer dynamic and permeable, and the stomata open.”

The optimum spray window for foliar N application is likely to be either early morning or later afternoon, when relative humidity tends to be highest. High light intensity can also increase uptake.
The magic number for relative humidity is 70% and above to optimise stomatal opening, he says. Research consistently shows greater uptake at higher relative humidity. High temperatures should be avoided with an absolute maximum of 28⁰C, but preferably no more than 25⁰C advised.
“Your optimum spray window is likely to be either early morning or later afternoon, when relative humidity tends to be highest. High light intensity can also increase uptake.”
On the leaf, you want the droplet to slowly dry out, but not too rapidly. Water slowly evaporating from nutrient droplets has a positive effect in making the nutrient more concentrated and therefore creating a gradient to make absorption into the leaf easier. But if it happens too quickly, the solution can crystallise leading to poor uptake.
Evaporation rate is defined by a metric called Delta T – effectively a combination of relative humidity and temperature. High Delta T means faster water evaporation. It typically has more relevance in hotter climates, says Joel, but it might be a useful indicator in hotter summers in the UK.
“You’re looking to spray when Delta T is between two and eight (see chart). When you’re in that band you have good humidity [for stomatal opening] and slow drying of the droplet which will help maximise uptake.”

Scorch is caused by urea or ammonium toxicity due to their build-up in the leaf, so Joel Williams says growers should be aware of this when using liquid urea protected with urease inhibitors as foliar treatments.
Where Delta T is increasing or too high, you can mitigate its effects by increasing water rates and using coarser nozzles. At lower Delta T values, the opposite applies so use lower water volumes and finer nozzles. Stickers can help keep the droplets on the leaf for longer. All these application tips should help minimise the risk of scorch, suggests Joel.
Leaf tip scorch is caused by urea or ammonium toxicity due to their build-up in the leaf. That’s why avoiding the use of protected urea with urease inhibitors is probably advisable in foliar sprays, he suggests.
“Supplying nickel with your foliar urea spray can help alleviate scorch by optimising urease enzyme activity.”
A similar study highlights that foliar silicon fertilisation before using foliar nitrogen could also help mitigate ammonium toxicity.
“Co-supply of amino acids or carbohydrates, such as molasses, will also help push urea down the conversion pathway and help reduce scorch,” he concludes.
This article was taken from the latest issue of CPM. Read the article in full here.
For more articles like this, subscribe here.
Sign up for Crop Production Magazine’s FREE e-newsletter here.